Monday, March 1, 2010

Essential Equipments for Photography: Part 1

A carpenter is nothing without his tools.

It is the same as for a photographer. It is essential for a photographer to have his camera whenever he is capturing photos. I am going to discuss some of the accessories that is needed, if you want to be a professional photographer or a dedicated hobbyist. Here are the following:

Lens
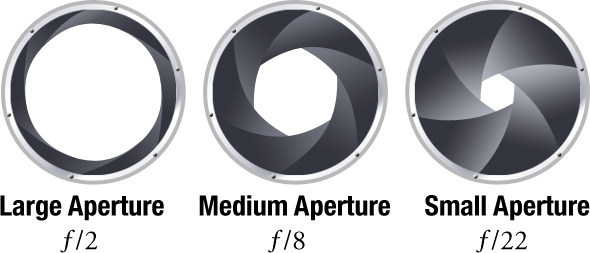
A photographer's canvas is the camera while the lens is his brush. Lenses are very important in photography. You cannot be a great photographer without a good lens. The use of lenses vary depending on the subject will be. Here are the types of lenses:
  • Standard Lens, a standard lens has a similar focal length as the human eye, usually 50mm. A 50mm is a versatile and popular lens as it is inexpensive and excellent in quality. These are usually the stock lens of a brand new camera.
  • Telephoto Lens, it has a focal length of 70mm to 300mm. These are popular to sports photographers as it is able to zoom in without moving in close.
  • Wide Angle Lens, it is a type of lens with a short focal length. It is popular to landscape photographers because of its wide vision. It is usually 24mm or 35mm.
  • Special Lenses, it includes Macro, Fisheye, and Teleconverter.
Note: Lenses have zoom that is important for a photographer. It is advisable to seek a lens with optical zoom as it does not blur the photo, unlike digital zoom that pixelates the photo.

Tripods
A tripod is very important to a photographer especially to landscape and night photographers. Tripods are used to stabilize a camera when shooting. Photographers use tripods when they are taking pictures that requires long exposures as it is more stable compared to your arms.

Filters
The use of filters depend on what type of photography you are using. Most filters have effects on the colors and quality of the picture. While some are used for special types of photography such as infrared, sepia, etc. There are types of filters such as UV, Polarizing, etc. You can find the details and explanations here, CameraFilters.com.

Lens Hood
This can be important depending on the situation. Lens Hoods are used to block sun or other light source to reduce glare and lens flare. It is situated at the end of the lens.

Spare Battery and Battery Grip
If you are going outdoors for a long time, you will need a spare battery. Spare batteries are needed for photographers who use their camera often. Battery grip is used in conjunction with spare batteries as this holds both of your batteries. This is convenient for those who don't like to charge often. And also, one other function of the battery grip is that it can be used for taking pictures in portrait orientation. There is a shutter button and main/command dial at the grip.

Next

    Friday, February 26, 2010

    Types of Photography

    There are different types of photography depending on the subject, location, purpose or the photographer's preferences. These are some of the most common types of photography.

    • Aerial, is a type of photography that uses airborne device or means of transportation such as plane, helicopter, balloon, kite and the like.
    • Animal, for the pet-lovers who want to take pictures of their irresistible pets.
    • Architectural, sometimes panoramic photos of structures to promote its beauty.
    • Black and White, a popular type that deals with shadows and highlights to give a dramatic effect on the composition.
    • Landscape, type that gives attention to the natural wonders of the Earth. From breath-taking views of the mountains to the beautiful sunset at the beach.
    • Macro, emphasizes objects with fascinating views of a close-up subject. Its scale can be full-size of 1:2.
    • Night, focuses on the attractiveness of city skylines during the night time wherein lights are abundant on structures. And it also captures fireworks, and scenery of the evening.
    • Panoramic, a type that produce a photo similar to what the human eyes can see. It can also be a picture showing the complete 360 degrees of the scenery.
    • Portrait, its goal is to create an atmosphere of the personality of the subject or a group of subject, whether it is a person, a pet, or a team.
    • Sports, often used for journalism or to capture a subject that is engaging in sports, games, or adventures.
    • Time-Lapse, is a photograph with very long exposure that is to illustrate what happens over time. One  example is a street at night with car lights blurred into long lines that creates a streaking line across the photo.
    • Underwater, focuses on the use of water-tight camera housing to produce photographs of the marine world.
     These are only the summaries of the types to give you a background on deciding on what purposes would you like to spend your photographs. I recommend you to search more information on your chosen field.

    Saturday, February 20, 2010

    Guide to Photography: Part 2

    Now you are ready for a more deep understanding of photography. First off, you need to know the basics in composition.

    Principles of composition

    The first principle is the point of interest, as discussed in the rule of thirds, this is the point wherein the subject attracts the viewer's eyes. It is basically the main focus of the photo. Related to the first principle is the principle of placing the subject off-center to give a strong relationship between the background and the foreground.

    Next is simplicity of the composition, we know that minimalism is one of the most popular style of art because it is directness. The fourth principle is symmetry, whether symmetrical or asymmetrical, it gives the viewer a distinct balance of the photo. Lighting is one of the most important principle. There are different types of techniques related to lighting, such as the use of shadows, silhouettes, etc.

    After learning about the principles in composition, know what type of photographs you are going to take. There are different techniques for different subjects.

    Basic Photography Techniques

    The techniques I will discuss would be useful for beginners and amateurs as it is fairly easy to understand.
    1. Afocal photography, this technique uses optical telescope or microscope to create an effect of close-up without the use of the built in zoom. This technique usually use point-and-shoot cameras because of its lightweight and less bulky structure, compared to a much larger SLR.
    2. Bokeh, originated in Japan that means blur. This technique uses small F-Stop which primarily is needed to blur the background, if a subject is present, or blur the entire view.
    3. Contre-jour, is a French term meaning against daylight. It uses daylight or other form of light source as backlighting to produce silhouettes of the subject.
    4. Fill flash uses the aperture and shutter speed in correct exposure for the background while the flash fills in foreground to produce equal lighting for both background and foreground.
    5. Fireworks photographs is one of the most interesting techniques. It makes use of long exposure to capture the fireworks from when it goes up until it explodes.
    6. Night photography is particular to photos taken between dusk and dawn with the use of artificial lighting or long exposure. This type usually is for city skylines or areas with beautiful night lights.
    These are only simple techniques that only require a camera, tripod and your knowledge. Try and experiment the techniques I have given. I will add some pictures on the effects of the techniques.

    Previous

    Friday, February 19, 2010

    Guide to Photography: Part 1

    I will be writing this guide to give information on photography. This guide will be a reference to beginners and amateurs, but can be helpful for experienced photographers.

    First off, knowing your reason in taking pictures is a must. Are you taking pictures as a hobby?, or do you like taking pictures for storing perfect memories?, and so on. After you have chosen your preference, you will need to know what camera type fits for you.

    Types of Cameras

    As you would have read, a Point and Shoot (or P&S) camera is suitable for people who capture for keeping memories while a Single Lens Reflex (SLR) camera would be more appropriate for a hobbyists and professionals. After choosing a type, you have to choose your brand. Personally, I had tried only a few cameras, a Canon EOS30D, Canon EOS450D, a Canon Powershot and Kodak Easyshare (can't remember both of the models though). As you can see, I have yet to try Nikon DSLRs. Anyway, I stumbled upon this article comparing Canon and Nikon DSLRs, Canon vs Nikon Digital SLR Cameras.

    After reading the comparison, you must get to know your camera. Read the manual included in the package, it will help a lot. And also, getting familiar with the terms will let you understand the functions. Here's a list of terms, Important Terms in Photography. These are the basics in photography jargon. From then on I will refer to the terms I mentioned above. Try out what you have learned and put it in to practice. "Practice makes perfect".

    Next

    Important Terms in Photography

    Aperture


    Aperture is one of the most confusing aspects of photography.It is an adjustable opening inside the camera lens that works very similar the iris in your eye. When the aperture wide, more light is allowed through the lens to expose the film or image sensor. When the aperture is narrow, less light reaches the film or image sensor. Aperture works in conjunction with shutter speed and film speed or ISO to determine the total amount of light that reaches the film. Aperture size also affects depth of field. A representation of aperture is found below.


    Depth of Field

    Depth of Field, or DOF, explains how deep the focus is within an image and is controlled by the aperture/F-Stop. Images with a large amount of the image in focus are said to have a large depth of field while images with only one small part in focus are said to have a small depth of field. This does not affect the side to side focus of the image, only the depth. A small DOF is more appropriate for a macro or close-up, and portraits, while a large DOF is applicable to landscape photographs.

    Shutter Speed


    Shutter speed is one of the most important controls on a camera. Shutter speed controls the amount of time that your film, or digital sensor, is exposed to light. The shutter is opened when you press the shutter release button on your camera to take a picture. The shutter speed determines how long the shutter remains open.

    In cameras with TTL (through the lens) viewfinders, the shutter release button also moves a mirror out of the way of the film and shutter curtain. The movement of the shutter curtain and the mirror that gives taking a picture its distinctive "click" sound. It is similar to the pinhole camera wherein the photographer exposes the paper and close the pinhole to create a picture. The representation below shows how the shutter works.


    ISO


    The ISO speed is a measure of the film speed, or its sensitivity to light. With digital cameras the ISO affects the sensor instead of the film, but the principal is the same. A low ISO speed requires a longer exposure or more light while a high ISO speed requires less time to give the same exposure or less light On 35mm film, a film with high ISO speed had much more grain than a slower film — but the modern sensors don’t create the same grain with high ISO speeds. Instead it creates noise. Use a low ISO speed if light is abundant while use a high ISO speed if indoors or bad lighting.

    Rule of Thirds


    The basic principle behind the rule of thirds is to imagine breaking an image down into thirds, both horizontally and vertically, so that you have 9 parts. As the image shows.


    The theory is that if you place the subject in the points of interest, the intersections of vertical and horizontal lines, that your photo becomes more balanced and will attract the viewer of the image to the subject. Studies have shown that when viewing images, people’s eyes usually go to one of the intersection points most naturally rather than the center. Using the rule of thirds works with this natural way of viewing an image rather than working against it.